For this recipe, there aren't really amounts because it just depends how well you coat the cutlets, and how many cutlets you have.
Ingredients:
- Thin sliced turkey cutlets (or pound flat some turkey or chicken)
- Flour
- Eggs (about 2 per lb of meat)
- Panko breadcrumbs
- Progresso Italian Style breadcrumbs
- Grated Parmesan (or the real stuff, parmigiano reggiano)
- Salt & pepper
- Garlic powder
- Oil for pan frying
Directions:
- In bowl #1, put flour and season with salt, pepper, and garlic powder. In bowl #2, put the two eggs with a bit of salt. In bowl #3, put your two kinds of breadcrumbs, cheese, and season with salt, pepper and garlic if your breadcrumbs need extra seasoning.
- Set up a drying rack with a sheet pan and a cooling rack on top (instead of a sheet pan, I used a silpad, or you could use paper towel).
- Place each cutlet, one at a time, in the flour and flip over to fully coat. Place each cutlet onto the drying rack. I do this step first with ALL the cutlets so that the flour can have a second to absorb any moisture.
- Before the next step of the breading, pour some oil (use Canola or Olive Oil) into a large flat bottomed saute pan. The larger the pan, the more you can cook at once. Heat over medium heat.
- After you finish with the flour coating, go back to your first cutlet and one at a time, dip them into egg, let the egg drain off a bit, and then dip into the breadcrumb mixture, and then place onto the drying rack. Go through each cutlet until you've finished all of them.
- Test your oil to make sure it's hot enough with a tiny drop of water. If it sizzles, it's ready!
- Carefully place about 3 pieces into the oil. Do not crowd the pan. Cook until the first side is browned. I personally like them pretty browned but some people like them a little lighter, so that's up to you. Timing completely depends on the heat of the oil, the thickness of your meat, and how browned you like them, so you'll just have to watch.
- Flip the cutlet over (carefully!) using tongs. Finish cooking on the second side. Once cooked to your liking, place the cooked cutlet either on a plate/pan covered in paper towels or onto cooling rack.
- Repeat until you're done with all the cutlets.
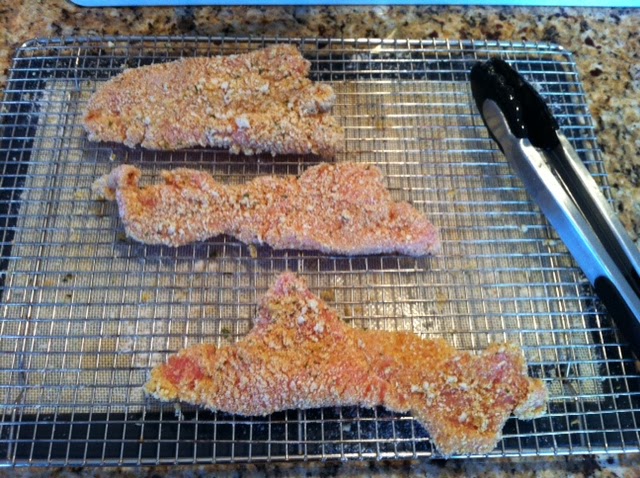
Here's a what the cutlets should look like after being fully breaded and ready to cook, atop a drying rack.
Below is a picture after I flipped the cutlets over to show you how brown they should look. YOu should constantly see little bubbles around the cutlet or your oil isn't hot enough. I keep a cover nearby just in case the oil starts to splatter too much, or (god forbid!) a fire occurs. If one does occur, cover the pan completely and turn off your stove immediately.

And below is the final product, cooling off. This lets the cutlet drain off any excess oil, while keeping the Panko crispy. A paper towel will work if you don't have a cooling rack, but it may steam the underneath and make them less crispy.

Another trick if you have kids or need to stretch the meal a bit. You can also bread and fry up slices of bread! I wouldn't use the first coating of flour, just the egg and then the breadcrumbs. They end up tasting like amazingly delicious breadsticks. My brother's and I used to fight over the fried bread!!
And with that, I'm up to at least 3 weeks of meals prepped for when baby arrives!
No comments:
Post a Comment